前言
前文说了在UE4中使用Python的方法,这篇文章就说一下在使用Python做UE4开发时常用的一些功能。
以下代码基于UE4.26,引擎自带的Python版本为3.7。
添加自定义菜单
这个功能可以在UE4的菜单栏上添加自定义的菜单,执行自定义的功能,方便用户使用。
import unreal

menus = unreal.ToolMenus.get()
main_menu = menus.find_menu("LevelEditor.MainMenu")  # 获取unreal的菜单控件

added_menu = main_menu.add_sub_menu(main_menu.get_name(), "MyMenu", "我的菜单", "我的菜单")  # 添加子菜单

entry = unreal.ToolMenuEntry(
    name='func1',
    type=unreal.MultiBlockType.MENU_ENTRY,
    insert_position=unreal.ToolMenuInsert('', unreal.ToolMenuInsertType.DEFAULT)
)  # 按钮
entry.set_label('测试')
entry.set_string_command(unreal.ToolMenuStringCommandType.PYTHON, "Name", 'print("测试一下")')  # 设置按钮的功能


added_menu.add_menu_entry('MyMenu', entry)  # 将按钮添加到子菜单


menus.refresh_all_widgets()  # 刷新菜单ui
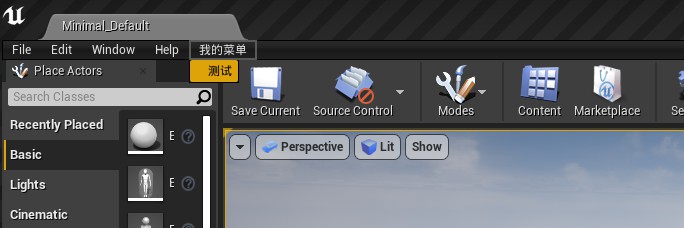
运行后生成的菜单如下
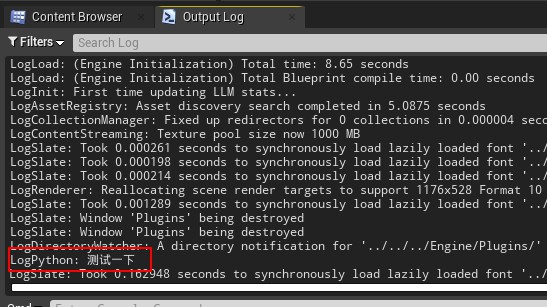
点击测试菜单命令后出现log如下
图形界面
在UE4中使用Python的PyQt库也可以制作图形界面,但因为UE4的图形界面是使用C++开发的,因此PyQt开发的页面是无法嵌入到UE4页面中的,这一点需要注意。
下面就来实现一个Qt窗口。
首先UE4自带的Python中没有PySide库,因此需要先给引擎自带的python(路径在Engine\Binaries\ThirdParty\Python3\Win64)安装PySide库。
pip install PySide2
另外同样由于UE4的图形界面是C++开发的,因此需要将Qt的窗口类与UE4的窗口进行关联,否则会导致UE4闪退或者卡死。
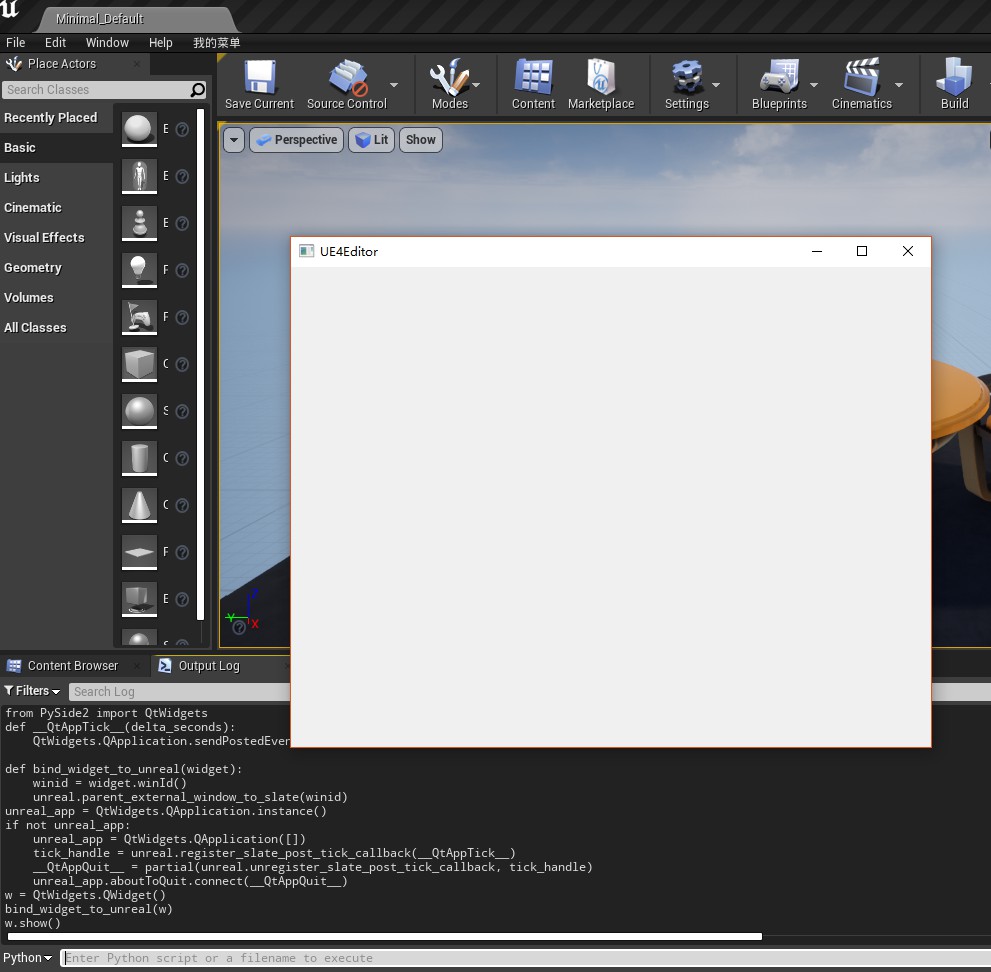
一个简单窗口的代码如下
import unreal
from functools import partial
from PySide2 import QtWidgets

def __QtAppTick__(delta_seconds):
    QtWidgets.QApplication.sendPostedEvents()

def bind_widget_to_unreal(widget):
    winid = widget.winId()
    unreal.parent_external_window_to_slate(winid)

unreal_app = QtWidgets.QApplication.instance()
if not unreal_app:
    unreal_app = QtWidgets.QApplication([])
    tick_handle = unreal.register_slate_post_tick_callback(__QtAppTick__)
    __QtAppQuit__ = partial(unreal.unregister_slate_post_tick_callback, tick_handle)
    unreal_app.aboutToQuit.connect(__QtAppQuit__)

w = QtWidgets.QWidget()
bind_widget_to_unreal(w)
w.show()
执行后效果如下
再结合QtDesigner制作的ui文件和通过Qt.py加载ui文件,就可以实现一个足够强大并且可以方便随时修改的UI窗口。
导入资产
对于图片、视频等资产的导入,实现是很简单的。
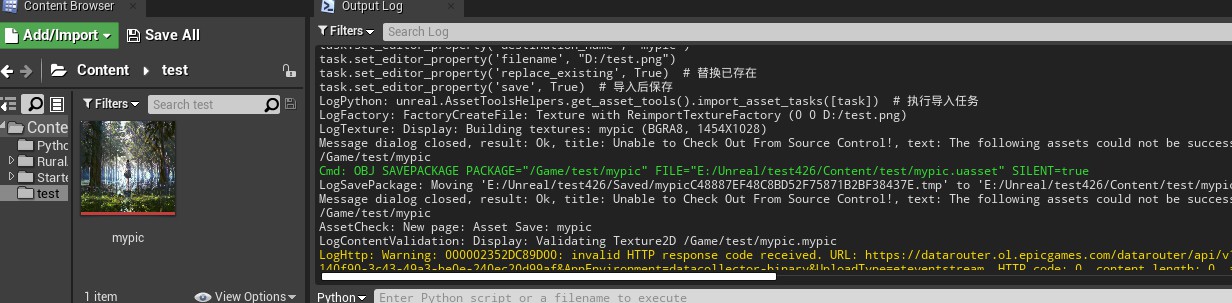
task = unreal.AssetImportTask()  # 创建导入的任务
task.set_editor_property('automated', True)
task.set_editor_property('destination_path', "/Game/test")
task.set_editor_property('destination_name', "mypic")
task.set_editor_property('filename', "D:/test.png")
task.set_editor_property('replace_existing', True)  # 替换已存在
task.set_editor_property('save', True)  # 导入后保存
unreal.AssetToolsHelpers.get_asset_tools().import_asset_tasks([task])  # 执行导入任务
运行后,图片就被导入成功了。
而对于fbx、abc、obj等模型文件的导入,就会比较复杂,在导入模型资产时会有如下这样的设置窗口。
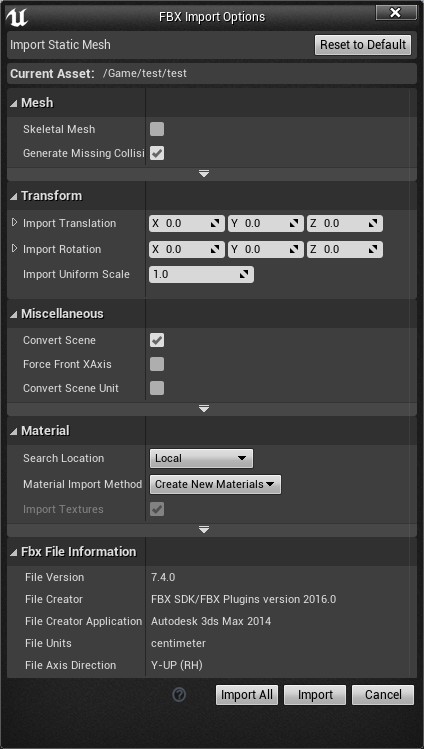
因此在使用Python导入模型资产时,也需要对这部分设置进行配置。
options = unreal.FbxImportUI()  #声明导入配置
options.set_editor_property('import_mesh', True)
options.set_editor_property('import_textures', False) #不导入材质
options.set_editor_property('import_materials', False) #不导入贴图

# 对于静态的fbx设置静态数据,包括合并网格,转换单位和方向等
options.set_editor_property('import_as_skeletal', False)
options.static_mesh_import_data.set_editor_property('combine_meshes', True)
options.static_mesh_import_data.set_editor_property('auto_generate_collision', False)
options.static_mesh_import_data.set_editor_property('generate_lightmap_u_vs', False)
options.static_mesh_import_data.set_editor_property('convert_scene', True)
options.static_mesh_import_data.set_editor_property('convert_scene_unit', True)
options.static_mesh_import_data.set_editor_property('vertex_color_import_option', unreal.VertexColorImportOption.REPLACE)


task = unreal.AssetImportTask()  # 创建导入的任务
task.set_editor_property('automated', True)
task.set_editor_property('destination_path', "/Game/test")
task.set_editor_property('destination_name', "fbx")
task.set_editor_property('filename', "D:/test.fbx")
task.set_editor_property('replace_existing', True)  # 替换已存在
task.set_editor_property('save', True)  # 导入后保存

# 将设置放到导入任务中
task.set_editor_property('options', options)

unreal.AssetToolsHelpers.get_asset_tools().import_asset_tasks([task])  # 执行导入任务
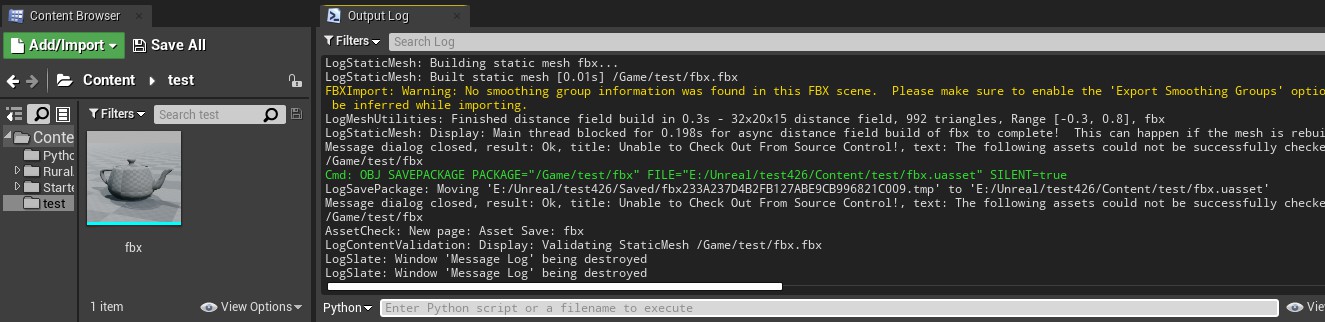
导入后效果如下
而在导入特效或毛发等文件时,会用到abc格式,这时候需要设置abc的导入配置。
另外由于轴向的问题,默认导入的物体朝向是错误的,需要修复。
# 修复abc的轴向问题
abc_conversion_settings = unreal.AbcConversionSettings(
    preset=unreal.AbcConversionPreset.MAYA,
    flip_u=False, flip_v=True, scale=[1.0, -1.0, 1.0],
    rotation=[90.0, 0.0, 0.0])

options = unreal.AbcImportSettings() #abc导入配置
options.set_editor_property('import_type', unreal.AlembicImportType.STATIC_MESH)
options.set_editor_property('conversion_settings', abc_conversion_settings)


task = unreal.AssetImportTask()  # 创建导入的任务
task.set_editor_property('automated', True)
task.set_editor_property('destination_path', "/Game/test")
task.set_editor_property('destination_name', "abc")
task.set_editor_property('filename', "D:/test.abc")
task.set_editor_property('replace_existing', True)  # 替换已存在
task.set_editor_property('save', True)  # 导入后保存

# 将设置放到导入任务中
task.set_editor_property('options', options)

unreal.AssetToolsHelpers.get_asset_tools().import_asset_tasks([task])  # 执行导入任务
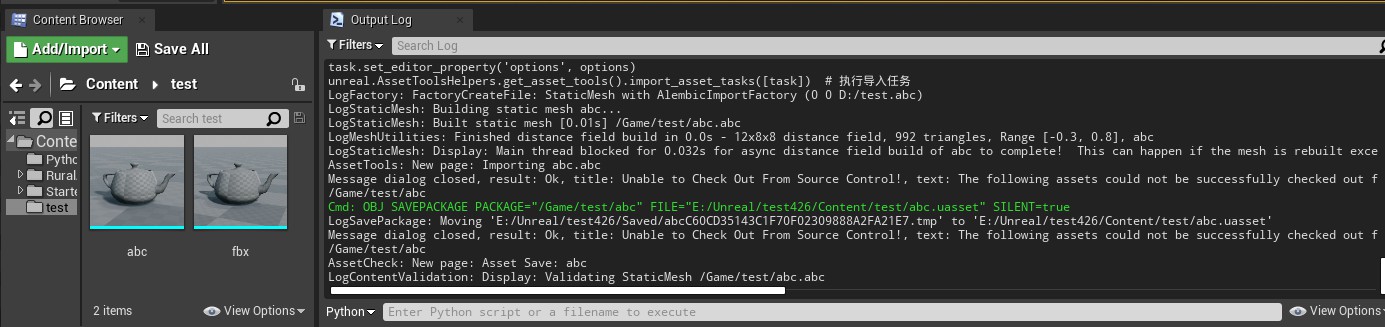
效果如下
除了轴向以外,从Maya中导入模型时还需要注意世界比例导致的缩放问题。
其他功能
资产管理
# 创建文件夹
unreal.EditorAssetLibrary.make_directory('/Game/Test/NewDirectory')

# 复制文件夹
unreal.EditorAssetLibrary.duplicate_directory('/Game/Test/OldDirectory', '/Game/Test/NewDirectory')

# 删除文件夹
unreal.EditorAssetLibrary.delete_directory('/Game/Directory')

# 重命名文件夹
unreal.EditorAssetLibrary.rename_directory('/Game/Directory', '/Game/NewDirectory')

# 复制资产
unreal.EditorAssetLibrary.duplicate_asset('/Game/Test/Old', '/Game/Test/New')

# 删除资产
unreal.EditorAssetLibrary.delete_asset('/Game/Test/File')

# 判断资产是否存在
unreal.EditorAssetLibrary.does_asset_exist('/Game/Test/New')

# 重命名资产
unreal.EditorAssetLibrary.rename_asset('/Game/Test/Old', '/Game/Test/New')

#选择指定资产
paths = ['/Game/Test/abc','/Game/Textures/Sky/Cloud']
unreal.EditorAssetLibrary.sync_browser_to_objects(paths)
物体操作
# 从资产创建物体
asset = unreal.EditorAssetLibrary.load_asset("/Game/Test/Fbx")
actor_location = unreal.Vector(0.0, 0.0, 0.0)
actor_rotation = unreal.Rotator(0.0, 0.0, 0.0)
unreal.EditorLevelLibrary.spawn_actor_from_object(asset, actor_location,actor_rotation)

# 从蓝图实例化物体
actor_class = unreal.EditorAssetLibrary.load_blueprint_class('/Game/BluePrint/MyActor')
actor_location = unreal.Vector(0.0, 0.0, 0.0)
actor_rotation = unreal.Rotator(0.0, 0.0, 0.0)
unreal.EditorLevelLibrary.spawn_actor_from_class(actor_class, actor_location, actor_rotation)

# 获取场景中的所有物体
actors = unreal.EditorLevelLibrary.get_all_level_actors()

# 获取场景中的所有组件
components = unreal.EditorLevelLibrary.get_all_level_actors_components()

# 获取场景中所选的物体
unreal.EditorLevelLibrary.get_selected_level_actors()

#在场景中选择物体
unreal.EditorLevelLibrary.set_selected_level_actors(actors_to_select)

# 获取GameWorld
world = unreal.EditorLevelLibrary.get_editor_world()

# 获取场景中某类的物体
unreal.GameplayStatics.get_all_actors_of_class(unreal.EditorLevelLibrary.get_editor_world(), bpname)

# 获取场景中有某tag的物体
unreal.GameplayStatics.get_all_actors_of_class(unreal.EditorLevelLibrary.get_editor_world(), tagname)
本文参考自影视后期流程小白的Unreal Python系列文章和Vanny Yuan的UnrealPython基础学习,有修改。
人生不能后悔,只能遗憾,
因为遗憾只是在感叹错过,
后悔却是否定了自己曾经的选择。
《一切都是最好的安排》
——辉姑娘


评论
还没有任何评论,你来说两句吧!